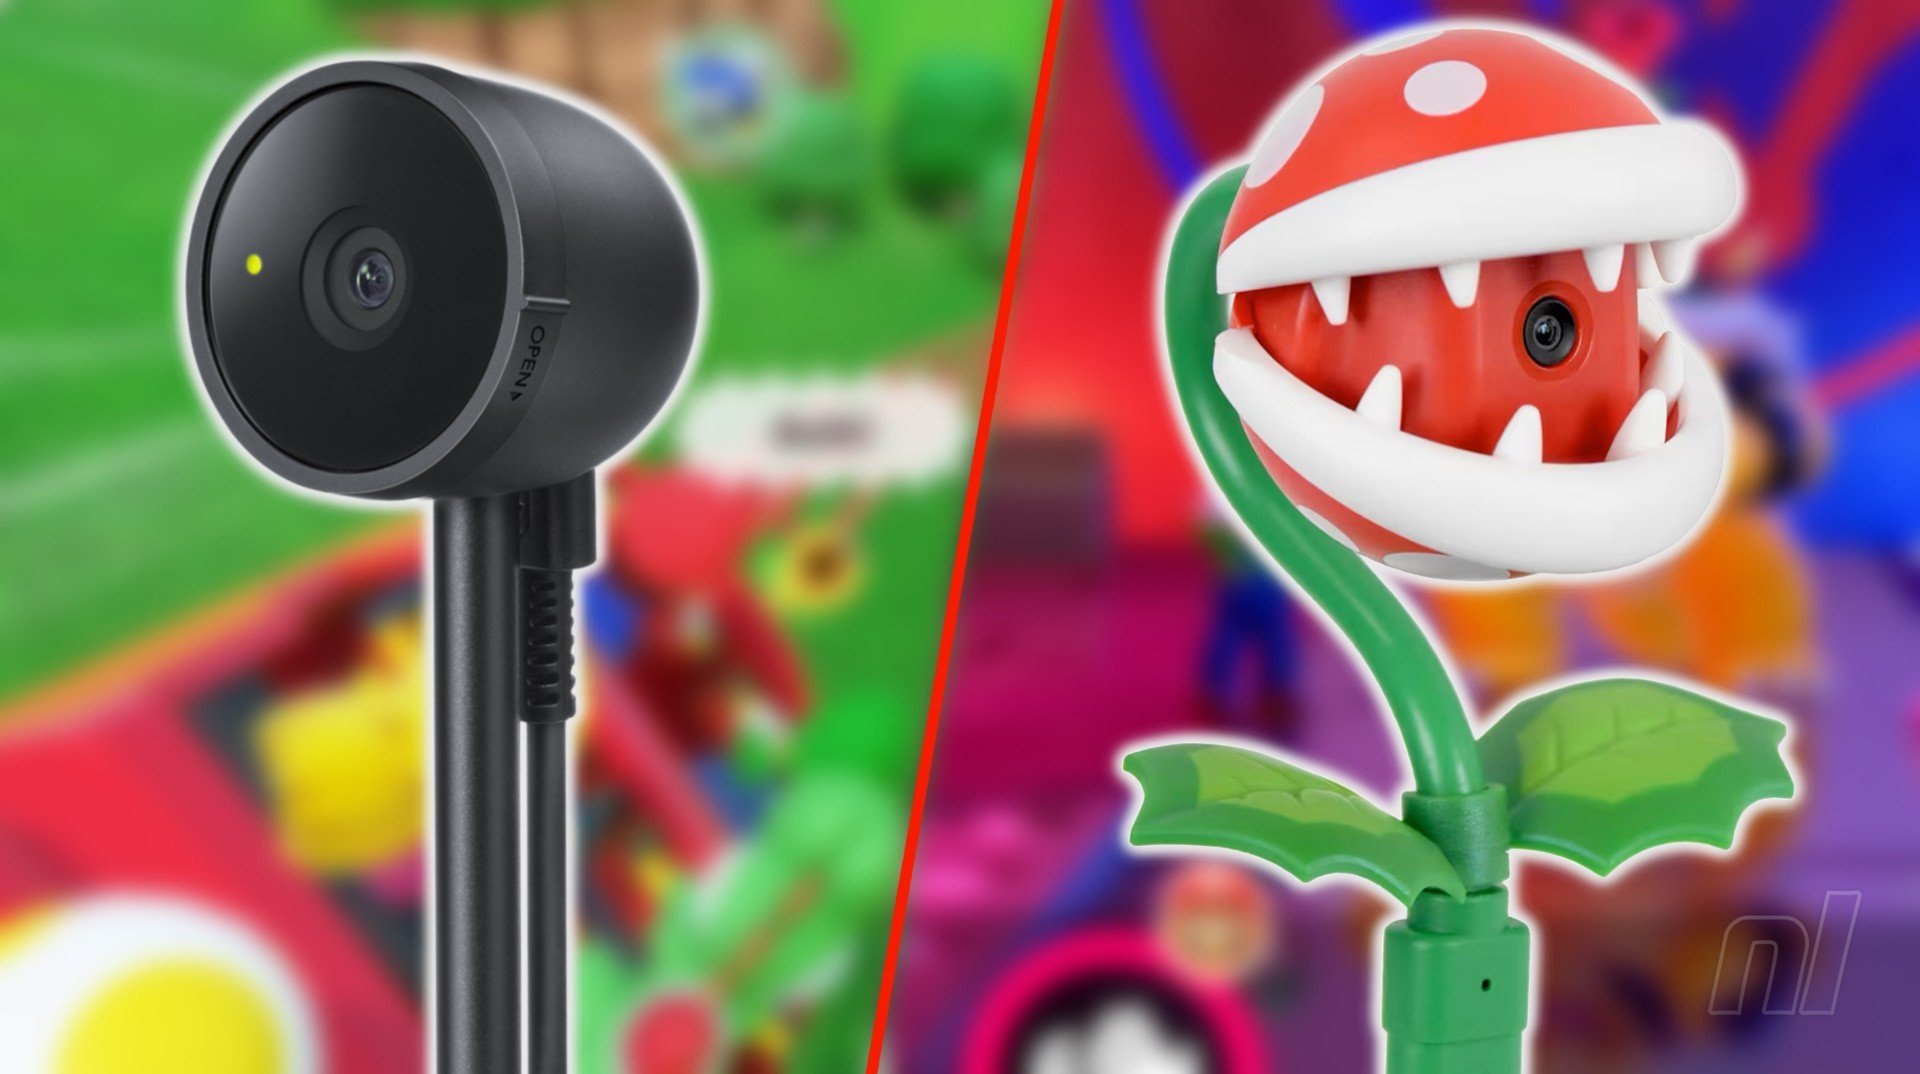
Nintendo Switch 2, the highly anticipated successor to Nintendo’s best-selling hybrid console, continues to win over fans with its accessible game capture features.
As more players look to share their moments from hit titles directly from their Nintendo Switch 2 to PCs, questions have arisen about the best ways to efficiently transfer screenshots—and the subtle hardware quirks that can complicate the process.
The Nintendo Switch and its follow-up, the Nintendo Switch 2, both allow users to capture in-game images at the press of a button.
These screenshots are invaluable for content creators, journalists, and players wanting to share their proudest gaming moments online.
For many, transferring these captures to a PC offers the fastest route to editing and publishing.
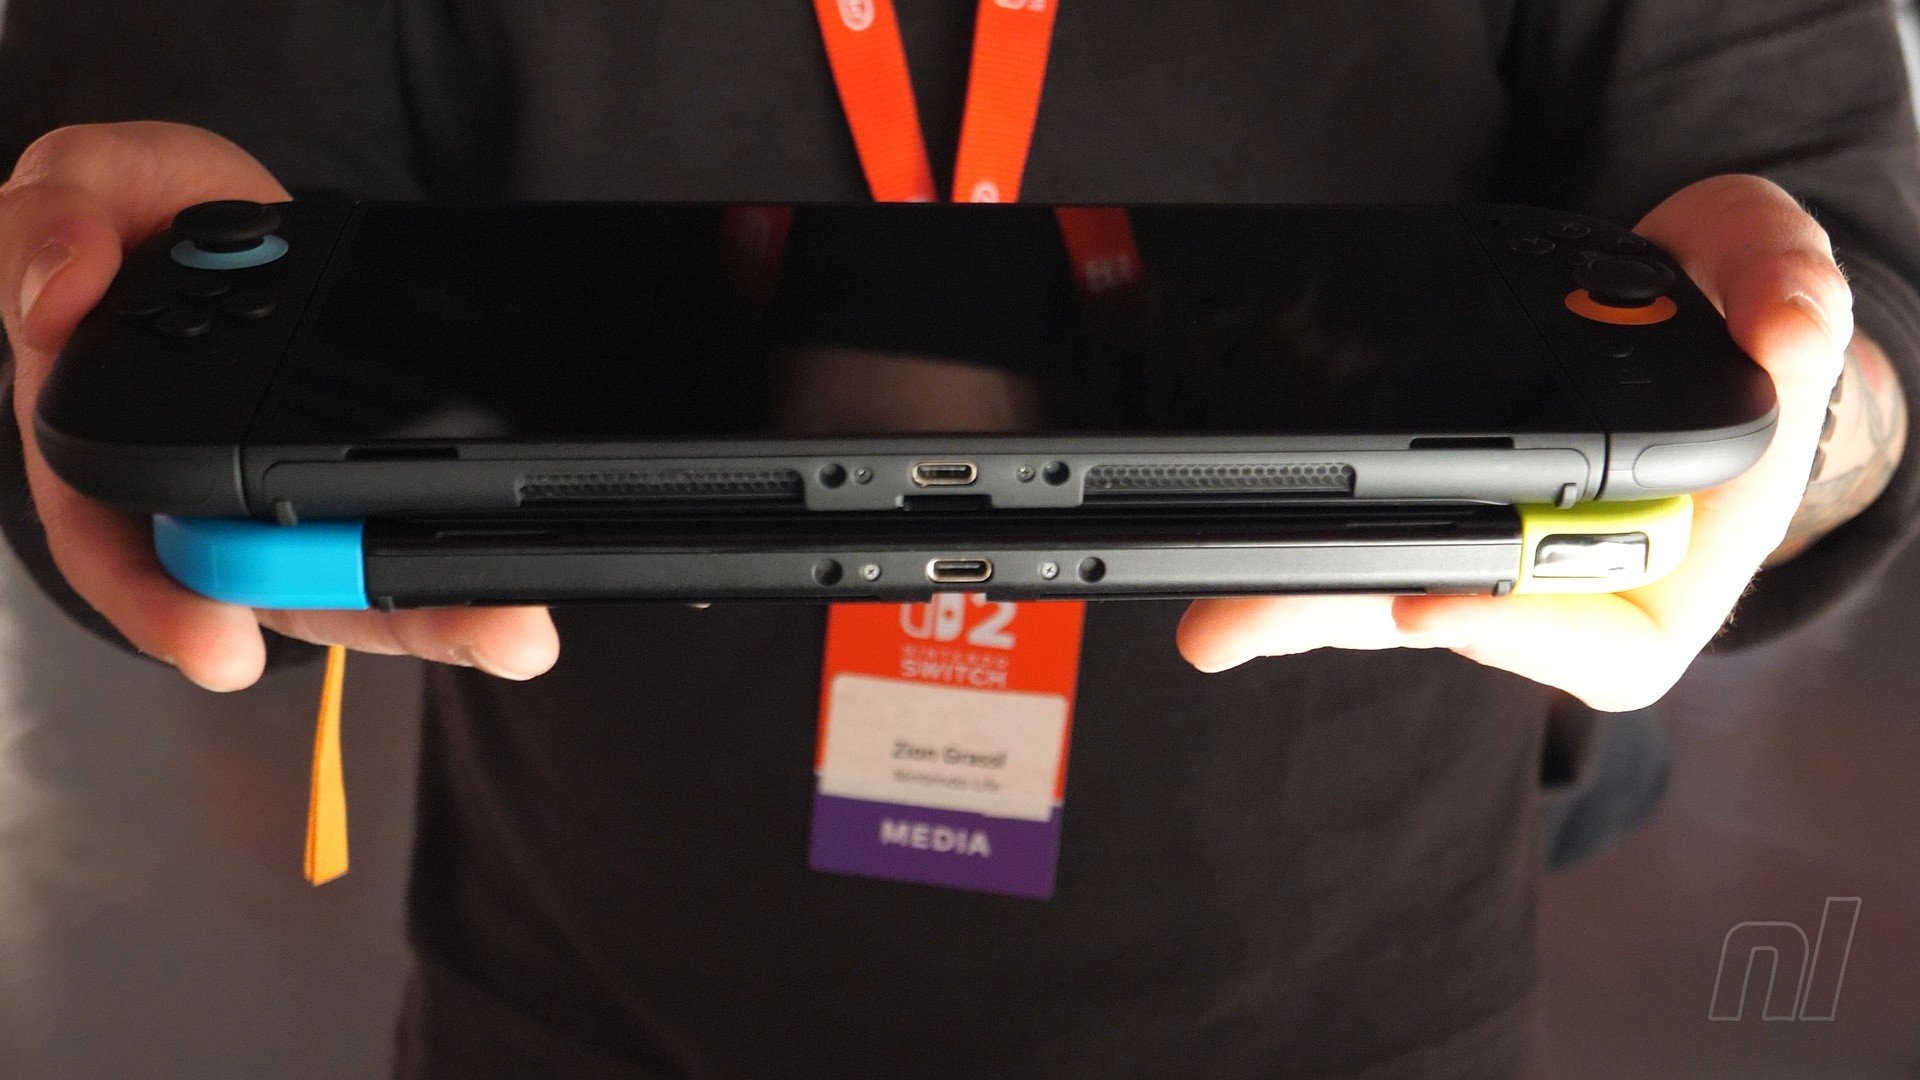
With Nintendo Switch 2, however, a key restriction has caught the attention of longtime users: not all USB-C ports on the hardware function identically for data transfer purposes.
The transfer process is simple in principle: connect your Nintendo Switch 2 to a PC via USB-C, and export your album’s screenshots.
However, only the lower of the two USB-C ports on the Switch 2 supports this feature.
As confirmed through direct user experience, attempting to use the upper USB-C port will result in an unobtrusive prompt stating data transfer is unsupported on that connection.
This requirement means that, when docked or set upright, the device cannot sit comfortably during transfers—a minor but notable limitation for those who regularly manage large amounts of game captures.
Nintendo has not formally commented on the reasoning behind this hardware limitation, but it’s likely due to internal design choices regarding data management and power delivery.
While understandable from a technical standpoint, it restricts options for users hoping for a tidier desktop setup while transferring content.
For players seeking alternative methods, Nintendo offers several solutions beyond physical USB transfer.
Screenshots can be quickly uploaded to smartphones by selecting images in the Switch’s Album and following the on-screen instructions—an option that reliably serves most casual needs.
Additionally, the Nintendo Switch app streamlines the process further.
With auto-upload enabled within the app’s settings, all screenshots are synchronized directly to the user’s linked devices, eliminating the need for cable management entirely.
To activate this feature, install the Nintendo Switch app on your mobile device, open your Switch 2’s Album, tap the settings gear in the bottom left, select your user icon, and toggle auto-upload in the Upload settings.
This ensures a seamless experience for managing and sharing game captures, reflecting Nintendo’s ongoing commitment to user-friendly design.
The Nintendo Switch and Nintendo Switch 2 have continually delivered innovations in both hardware and cloud-integrated software, as seen in their steady updates and sales records.
Since its launch, the Switch series has surpassed 125 million units sold, with software sales equally robust through the Nintendo eShop and retail partners.
In the ever-evolving landscape of game capture, Nintendo’s approach to screenshot transfer may present small annoyances, but the platform’s flexibility and variety of transfer options keep it ahead of the curve for most gaming enthusiasts.
Have you encountered any quirks or improvements you’d like to see in screenshot management on Nintendo Switch 2?
Share your thoughts and experiences with the gaming community.
As more players look to share their moments from hit titles directly from their Nintendo Switch 2 to PCs, questions have arisen about the best ways to efficiently transfer screenshots—and the subtle hardware quirks that can complicate the process.
The Nintendo Switch and its follow-up, the Nintendo Switch 2, both allow users to capture in-game images at the press of a button.
These screenshots are invaluable for content creators, journalists, and players wanting to share their proudest gaming moments online.
For many, transferring these captures to a PC offers the fastest route to editing and publishing.
With Nintendo Switch 2, however, a key restriction has caught the attention of longtime users: not all USB-C ports on the hardware function identically for data transfer purposes.
The transfer process is simple in principle: connect your Nintendo Switch 2 to a PC via USB-C, and export your album’s screenshots.
However, only the lower of the two USB-C ports on the Switch 2 supports this feature.
As confirmed through direct user experience, attempting to use the upper USB-C port will result in an unobtrusive prompt stating data transfer is unsupported on that connection.
This requirement means that, when docked or set upright, the device cannot sit comfortably during transfers—a minor but notable limitation for those who regularly manage large amounts of game captures.
Nintendo has not formally commented on the reasoning behind this hardware limitation, but it’s likely due to internal design choices regarding data management and power delivery.
While understandable from a technical standpoint, it restricts options for users hoping for a tidier desktop setup while transferring content.
For players seeking alternative methods, Nintendo offers several solutions beyond physical USB transfer.
Screenshots can be quickly uploaded to smartphones by selecting images in the Switch’s Album and following the on-screen instructions—an option that reliably serves most casual needs.
Additionally, the Nintendo Switch app streamlines the process further.
With auto-upload enabled within the app’s settings, all screenshots are synchronized directly to the user’s linked devices, eliminating the need for cable management entirely.
To activate this feature, install the Nintendo Switch app on your mobile device, open your Switch 2’s Album, tap the settings gear in the bottom left, select your user icon, and toggle auto-upload in the Upload settings.
This ensures a seamless experience for managing and sharing game captures, reflecting Nintendo’s ongoing commitment to user-friendly design.
The Nintendo Switch and Nintendo Switch 2 have continually delivered innovations in both hardware and cloud-integrated software, as seen in their steady updates and sales records.
Since its launch, the Switch series has surpassed 125 million units sold, with software sales equally robust through the Nintendo eShop and retail partners.
In the ever-evolving landscape of game capture, Nintendo’s approach to screenshot transfer may present small annoyances, but the platform’s flexibility and variety of transfer options keep it ahead of the curve for most gaming enthusiasts.
Have you encountered any quirks or improvements you’d like to see in screenshot management on Nintendo Switch 2?
Share your thoughts and experiences with the gaming community.